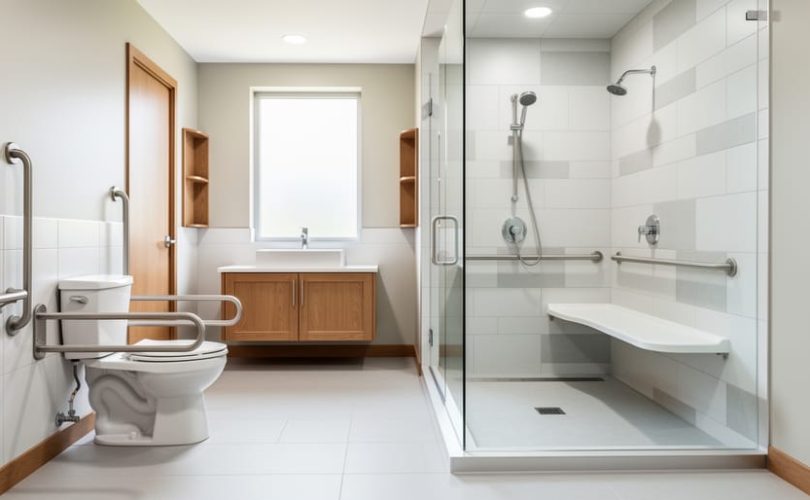
Strategic bathroom modifications keep seniors safe and independent at home longer, with five core changes proven to prevent falls and preserve dignity: grab bars near the toilet and in the shower, a walk-in or roll-in shower with a built-in seat, non-slip flooring, improved lighting with motion sensors, and a comfort-height toilet. These aren’t cosmetic upgrades. They’re practical interventions that address the reality that more than one in four Canadians over 65 will experience a fall each year, and bathrooms account for the majority of those incidents.
The bathroom poses unique risks. Wet surfaces, quick position changes from sitting to standing, and limited maneuvering space create a perfect storm for injury. But the right modifications transform this high-risk zone into a space that supports confidence and autonomy. A grab bar provides stability during transitions. A curbless shower eliminates a tripping hazard. Bright, shadow-free lighting helps aging eyes navigate safely at any hour.
For adult children researching options for parents, or seniors planning ahead, the challenge isn’t just knowing what changes exist. It’s determining which modifications deliver the greatest impact for your specific situation and budget, then implementing them before a crisis forces hurried, reactive decisions.
This guide walks through bathroom modifications organized by their safety impact and cost, helping you prioritize changes that matter most. Whether you’re considering a minor update or a comprehensive bathroom renovation Kitchener residents trust for aging-in-place projects, you’ll find clear, actionable guidance to make informed decisions that protect independence and wellbeing for years to come.
Why the Bathroom Is the Make-or-Break Room for Aging at Home
The bathroom accounts for more fall-related injuries among seniors than any other room in the home. That’s not surprising when you consider the combination of wet surfaces, hard porcelain and tile, confined spaces, and the physical demands of bathing and toileting. What is surprising is how often these preventable accidents become the turning point that ends independence.
A bathroom fall doesn’t just mean a trip to the emergency room. For many seniors, it marks the beginning of a cascade: reduced confidence, fear of falling again, decreased activity, loss of strength, and ultimately, the decision to leave home for assisted living. The injury itself might heal in weeks, but the psychological impact can last months or years. Many older adults who experience a bathroom fall start avoiding certain activities, shower less frequently, or begin relying on family members for help with tasks they previously managed independently.
The stakes go beyond physical safety. Your bathroom is where you maintain personal hygiene, manage health routines, and perform private tasks that define adult independence. When that space becomes threatening rather than functional, it affects dignity and self-determination in profound ways. The senior who needs help getting in and out of the shower has lost more than mobility. They’ve lost privacy and control over their own body care.
The confined layout of most bathrooms makes them particularly hazardous. There’s little room to catch yourself if you slip, and every surface you might grab is either slippery, unstable, or unforgiving. The towel bar won’t support your weight. The shower curtain rod will pull away from the wall. You’ll hit tile, porcelain, or the tub edge on your way down. Unlike a living room fall onto carpet, bathroom falls typically result in serious injuries that require hospitalization.
This is why bathroom modifications aren’t just about convenience. They’re about whether you can continue living independently in your own home for years to come.
Essential Bathroom Modifications That Make the Biggest Impact
Walk-In Showers and Barrier-Free Entry
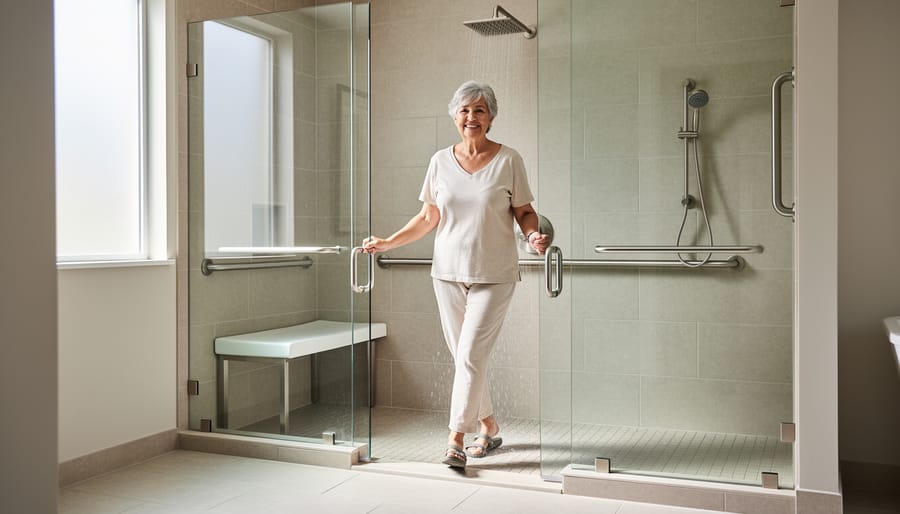
The threshold you step over to enter your shower, that small lip or curb, creates the single most dangerous moment in most seniors’ daily routines. Lifting your leg over a barrier while balancing on one foot, often on a wet surface, combines multiple fall risks into one unavoidable movement. Removing that barrier eliminates the risk entirely.
A properly designed walk-in shower allows you to enter at floor level, either walking or rolling in a wheelchair. The floor slopes gently toward the drain (typically ¼ inch per foot) to prevent water from spreading across the bathroom while maintaining easy entry. This gradual slope feels natural underfoot and creates no tripping hazard, unlike a sudden edge.
The construction requires careful waterproofing since there’s no raised barrier to contain water. Professional installation typically involves a linear drain positioned near the shower entrance, creating a gentle downward slope that keeps water flowing in the right direction. The shower area itself should measure at least 36 inches wide to accommodate comfortable movement and potential future needs like a shower chair or walker.
The cost ranges from $3,000 to $8,000 depending on size and finishes, but this modification often makes the difference between staying home and moving to assisted living. Many seniors who’ve made this change report they wish they’d done it years earlier, not just for safety, but because showering becomes genuinely easier and less stressful. That daily relief compounds into sustained confidence and independence.
Strategic Grab Bar Placement (Not Where You Think)
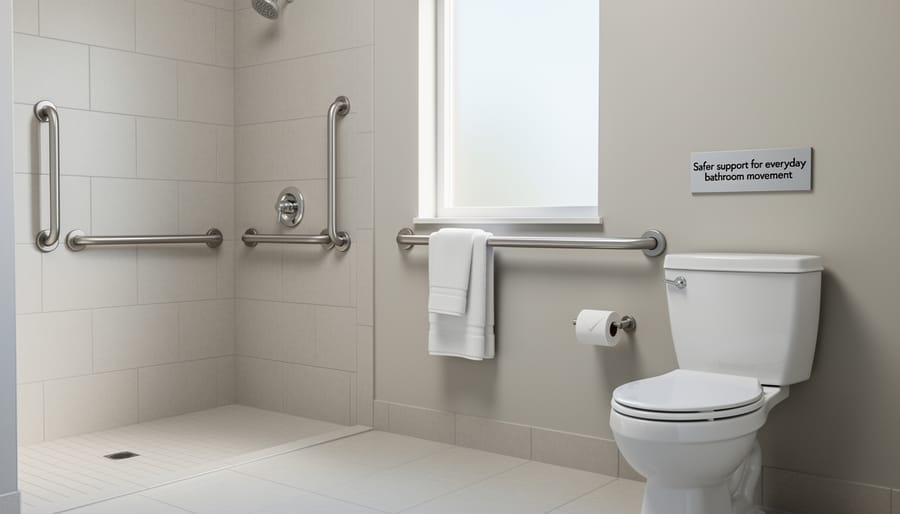
Most people install grab bars where they look helpful, then wonder why they still feel unsteady. The problem isn’t the bars themselves, it’s that intuitive placement rarely matches how bodies actually move in a bathroom.
The most effective grab bar sits on the wall perpendicular to your toilet, positioned so you can reach it at hip height while sitting and standing. This placement supports the natural push-pull motion of standing up, which is where most bathroom falls happen. A horizontal bar works better here than a vertical one because it accommodates the full range of motion as you rise.
For showers, forget the single bar mounted at chest height. You need two: one horizontal bar on the long wall at shoulder height for balance while standing, and another on the control wall positioned where you can grip it before stepping in and out. That entry-exit transition is the highest-risk moment, not the actual showering.
Load-bearing installation separates useful grab bars from dangerous ones. Decorative towel bars bolted into drywall will pull out under full body weight. Proper grab bars must anchor into wall studs or use specialized blocking installed during construction. If you’re retrofitting, heavy-duty toggle bolts rated for the bar’s weight capacity can work, but professional installation ensures the bar can actually support someone who’s falling.
Test placement before permanent installation. Stand where you’ll use the bar and reach naturally, your hand should land on it without stretching or awkward angles. A grab bar you have to hunt for won’t help in the moment you need it most.
Non-Slip Flooring That Actually Works
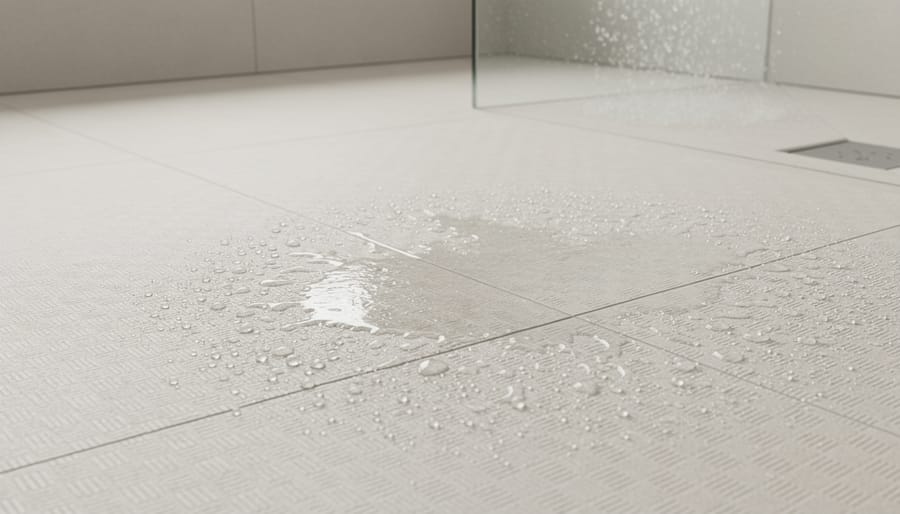
The coefficient of friction matters more than the material itself. Look for flooring rated DCOF (Dynamic Coefficient of Friction) 0.42 or higher, that’s the threshold where wet surfaces stay safe under foot. Most standard bathroom tile fails this test when wet, which explains why falls happen even in recently renovated bathrooms.
| Flooring Material | DCOF Rating | Maintenance | Cost Range |
|---|---|---|---|
| Textured porcelain tile | 0.50-0.60 | Weekly damp mop | $8-15/sq ft installed |
| Rubber safety flooring | 0.65-0.80 | Daily sweep, weekly clean | $6-12/sq ft installed |
| Vinyl with textured surface | 0.45-0.55 | Weekly damp mop | $4-8/sq ft installed |
| Cork with sealed finish | 0.50-0.60 | Reseal every 2-3 years | $7-10/sq ft installed |
Texture creates traction, but deep grout lines trap dirt and make wheelchair navigation difficult. Larger format tiles (12×24 inches or bigger) with minimal grout reduce cleaning work while maintaining slip resistance. The tile surface itself needs texture, not just the grout.
Avoid high-gloss finishes. They look sleek but become skating rinks when wet. Matte or honed finishes with subtle texture provide grip without looking institutional. Test samples by wetting them and checking traction with bare feet, you’ll immediately feel the difference between true slip resistance and surface texture that’s mostly decorative.
Rubber flooring works exceptionally well but some people resist the commercial look. Newer products mimic stone or wood grain while delivering superior traction. The cushioned surface also reduces injury severity if falls do occur, an advantage hard tile can’t match.
Shower Seats and Transfer Benches
Shower seats come in two basic types, and choosing the right one depends on how permanent the bathroom changes need to be. Built-in benches attach directly to the shower wall with anchors secured into framing, creating a stable platform that won’t shift during transfers. These work best when renovating from scratch or when mobility challenges are progressive and permanent. The advantage is rock-solid stability and a cleaner look without legs cluttering the shower floor.
Portable transfer benches solve a different problem. They extend beyond the shower threshold, letting someone sit outside the shower and then slide across into the spray area without stepping over anything. This makes them ideal for anyone who struggles with balance or leg strength during transfers. The trade-off is that they take up more space and need to be moved for other household members to use the shower normally.
Height matters more than most people realize. Standard shower seats sit 17 to 19 inches high, matching typical toilet height, which makes transfers between fixtures easier and reduces strain on knees when sitting down or standing up. Too low forces struggling with weak quadriceps; too high leaves feet dangling without stable support.
Position the seat perpendicular to shower controls so someone can reach temperature and spray settings without twisting or overreaching. Leave at least 15 inches of clear space beside the seat for maneuvering during transfers and enough room in front for a caregiver to assist if needed.
The Often-Overlooked Changes That Preserve Dignity
Comfort-Height Toilets and Safety Frames
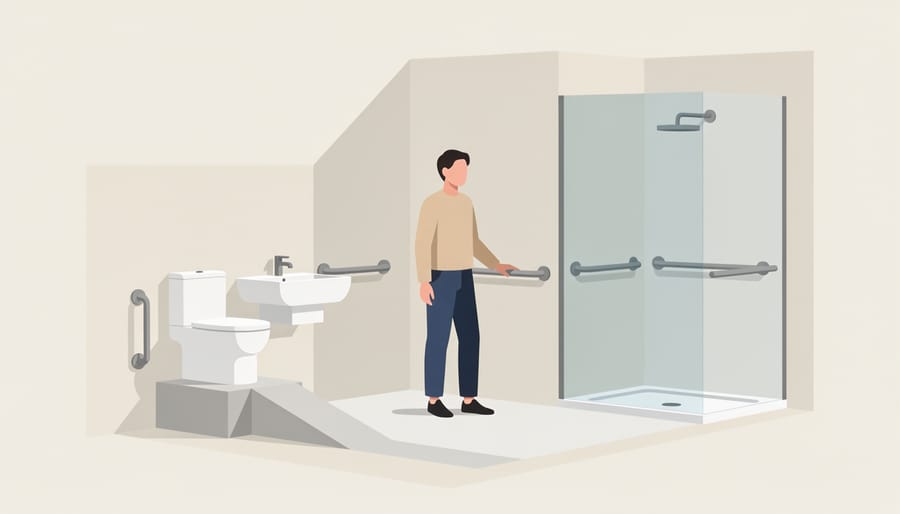
Getting on and off the toilet becomes harder as knee and hip strength decline, yet this is one of the most frequent daily movements seniors make. Standard toilets sit around 15 inches high, which requires significant leg strength to stand from. Comfort-height toilets measure 17 to 19 inches from floor to seat, the same height as most chairs, and reduce the effort needed by roughly 30 percent.
The higher seat means less bend in the knees and hips, making transfers easier for people with arthritis, hip replacements, or general weakness. Most people don’t realize how much they struggle until they use a comfort-height model. The difference isn’t subtle.
Safety frames add another layer of support. These freestanding or floor-mounted armrests provide stable push-off points when standing and controlled lowering when sitting. Unlike grab bars mounted on walls, frames surround the toilet on both sides, offering support regardless of which hand is stronger or which direction you approach from.
For mild mobility issues, a simple raised toilet seat adds 2 to 4 inches of height without renovation. For moderate challenges, pairing a comfort-height toilet with a safety frame creates a stable transfer station. For significant mobility limitations, frames with adjustable arms accommodate walkers or wheelchairs and provide crucial stability that wall-mounted bars alone can’t match.
The key is matching the solution to current ability while anticipating future needs.
Accessible Sink and Vanity Design
A bathroom sink might seem straightforward, but its design profoundly affects whether seniors can maintain their grooming routines independently. The right sink setup accommodates changing mobility while preserving personal care habits that matter for health and confidence.
Knee clearance transforms a standard vanity into one you can use from a wheelchair or shower chair. Look for a clearance of at least 27 inches high and 30 inches wide beneath the sink. Wall-mounted sinks provide the most flexibility, while modified vanities with removed cabinet doors work if you need some storage. The key is eliminating barriers that force someone to stand or awkwardly reach.
Lever faucets require minimal grip strength compared to traditional knobs, which can become nearly impossible with arthritis. A single-lever design is ideal because it lets you control temperature and flow with one motion, even if your hands are slippery or shaky. Touchless faucets eliminate gripping entirely, though they need reliable batteries or power.
Storage placement determines whether daily items stay accessible or become frustration points. Keep toothbrushes, medications, and face care products between waist and shoulder height. Deep lower cabinets force painful bending, while high shelves require risky reaching. Open shelving or shallow drawers at mid-height let you grab what you need without strain. Consider pull-out organizers that bring contents forward rather than making you dig into dark cabinet corners.
These adjustments keep morning and evening routines manageable, which directly supports the consistent hygiene and medication habits essential for healthy aging.
Lighting That Prevents Accidents and Disorientation
Poor lighting causes as many bathroom accidents as slippery floors, yet it’s one of the easiest problems to fix. Aging eyes need three to four times more light than younger eyes to see clearly, and the contrast between dark hallways and bright bathrooms can cause dangerous disorientation.
The most effective approach uses multiple light sources at different levels rather than relying on a single overhead fixture. Install bright task lighting around mirrors for grooming, softer ambient lighting from the ceiling or walls, and low-level nightlights near the floor to illuminate pathways without creating harsh shadows or glare.
Motion-activated lights solve the nighttime fumbling problem that leads to many falls. Mount them to switch on automatically when someone enters, eliminating the need to find light switches in the dark. Choose warm-colored LEDs (2700-3000K) for nighttime fixtures because bright white light can jolt the eyes and interfere with returning to sleep.
Reducing glare matters just as much as adding light. Frosted bulbs and fixtures with diffusers spread light evenly without creating spots that temporarily blind or confuse. Matte finishes on walls and countertops reflect less harshly than glossy surfaces.
Dimmer switches let you adjust brightness throughout the day, providing gentle illumination at night and full visibility when needed. The combination of adequate lighting, automatic activation, and glare reduction transforms bathroom safety without requiring major construction.
How to Prioritize Changes Based on Your Current Needs
The biggest mistake people make is trying to implement every bathroom modification at once, either spending thousands unnecessarily or becoming overwhelmed and doing nothing. The smarter approach starts with an honest assessment of what you need right now versus what might become important in two or five years.
Begin by evaluating current mobility patterns rather than age or diagnosis. Can you step over a standard tub rim without steadying yourself? Do you reach for the towel bar when standing from the toilet? These everyday compensations reveal your actual needs better than any checklist.
- Observe bathroom use for one week and note any moments when you grab walls, fixtures, or furniture for balance, even briefly.
- Document specific challenges like difficulty lifting legs to enter the tub, needing extra time to stand from the toilet, or feeling unsteady on wet floors.
- Consider recent changes in stability, strength, or confidence, particularly after illness, medication changes, or minor injuries.
- Identify which daily activities feel rushed or stressful because of safety concerns, and which you have started avoiding altogether.
This self-assessment creates a clear picture of urgent needs versus future-proofing. Someone who grabs the towel bar while standing needs grab bars and possibly a comfort-height toilet immediately. Someone who feels slightly unsteady but manages fine has time to plan more comprehensive changes.
Next, think about trajectory. Progressive conditions require anticipating future needs, while post-surgery recovery might need temporary solutions. A walk-in shower makes sense if you expect declining mobility. Portable equipment works when you are recovering from a specific injury.
Budget constraints make prioritization critical. If funds are limited, address the changes that prevent falls first: grab bars and non-slip flooring deliver the most safety per dollar spent. Save aesthetic upgrades and convenience features for later phases. One properly installed grab bar beats three decorative towel bars that cannot support body weight.
The goal is matching modifications to your actual risk profile and movement patterns, creating a bathroom that supports your life today while accommodating reasonable future needs without overbuilding for hypothetical scenarios.
Working With Professionals vs. DIY Modifications
Some bathroom modifications are weekend projects. Others require licensed professionals who understand both building codes and aging-in-place needs. Knowing the difference prevents wasted money and ensures modifications actually improve safety.
Start with simple, no-tool changes: swap regular towels for grab-bar towels, add slip-resistant mats with suction backing, replace round doorknobs with lever handles, and install a handheld showerhead with a slide bar. These immediate improvements cost under $200 total and require no expertise.
Next tier: basic installations like toilet safety frames, portable shower seats, and peel-and-stick non-slip strips. Anyone comfortable with basic tools can handle these. Just verify weight ratings and follow manufacturer instructions for secure attachment.
Hire professionals for anything structural. Grab bars must attach to wall studs or blocking, not just drywall. Walk-in shower conversions involve waterproofing, drainage, and tile work where mistakes create expensive problems. Lowering vanities requires plumbing adjustments. These aren’t just handyman jobs, look for contractors with aging-in-place certifications (CAPS designation from the National Association of Home Builders).
Before any major renovation, schedule an assessment with an occupational therapist who specializes in home modifications. They evaluate your specific mobility patterns, identify fall risks you might miss, and recommend modifications tailored to your needs rather than generic checklists. Medicare covers these assessments when prescribed by your doctor, and the personalized guidance prevents spending thousands on changes that don’t address your actual challenges.
The occupational therapist’s report also helps contractors understand why certain specifications matter, bridging the gap between accessibility needs and construction execution.
The Connection Between Bathroom Safety and Overall Health
Bathroom safety modifications create ripple effects that extend far beyond fall prevention. When seniors feel confident navigating their bathroom independently, they maintain the daily routines that form the foundation of good health.
Consider morning hygiene. A bathroom that’s difficult or frightening to use often leads to rushed or skipped routines. Seniors may avoid showering as frequently, skip dental care, or neglect wound care simply because the environment feels hazardous. Over time, these compromises accumulate into genuine health problems: infections, dental disease, skin breakdown. An accessible bathroom removes these barriers, making it easy to maintain the hygiene practices that prevent avoidable health complications.
The connection to medication adherence runs deeper than most people realize. Many seniors organize their daily medications around bathroom routines, taking pills with their morning wash-up or before bed. When bathroom access becomes difficult, this reliable anchor point disappears. Pills get forgotten, timing becomes erratic, and health conditions that were well-managed start to destabilize.
Physical activity follows a similar pattern. Seniors who fear bathroom falls often limit fluid intake to reduce trips, leading to dehydration and its cascade of problems: urinary tract infections, confusion, weakness, constipation. They may also avoid the walking and movement that bathroom trips naturally provide throughout the day. While these trips might seem insignificant, they represent crucial moments of activity for less mobile seniors.
Perhaps most important is psychological confidence. Knowing you can safely use your bathroom at 2 a.m. without assistance maintains dignity and independence. This confidence supports the mindset of an active, capable person rather than someone in decline, which shapes every other health decision you make.
Making bathroom changes isn’t about admitting you’re getting old. It’s about choosing the home you love over the nursing home you don’t. The modifications we’ve covered give you years of independence, not just months of safety.
Start with one change. A grab bar costs less than a single day in the hospital after a fall. A walk-in shower is cheaper than three months in assisted living. These aren’t expenses; they’re investments in staying exactly where you want to be.
The seniors who age successfully at home share one trait: they plan ahead instead of reacting to crises. They make their bathroom safer before they need it safer. That proactive mindset applies beyond the bathroom too, whether you’re maintaining simple fitness routines exploring weight loss and exercise supporting your exercise metabolism or accessing mental health support. Consider these exercise tips for aging as you build your complete wellness plan.
Your bathroom should support your independence, not threaten it. Start today with the changes that matter most for your situation. Five years from now, you’ll be grateful you did, and you’ll still be home.